| | 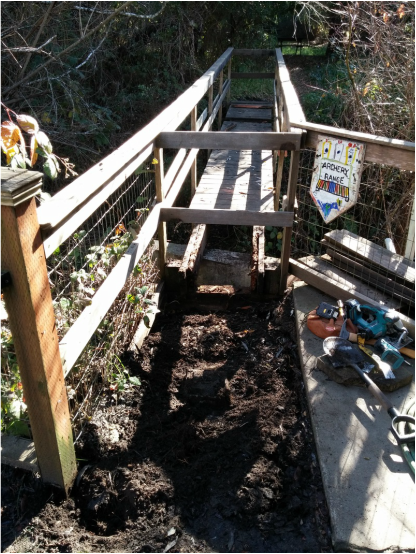 | The old bridge was very bouncy. After an initial assessment, where I took off key deck boards, it was clear that both support beams were rotted out as well as broken in two separate locations. Initially the discussion revolved around "sister"ing or replacing just one or two of the rotted beams. After the assessment it became clear that all the supports would need to be replaced. So we tore down the whole bridge. It was evident after this assessment that the handrail was holding up the bridge under compression. |
| It was clear from the severe rot on the support beams that it was time to replace the entire bridge. The supports for the old bridge were sistered 2x8 redwood beams. This technique has a tendency to collect water in the crevice on the top of the beams and rot them out from above. | 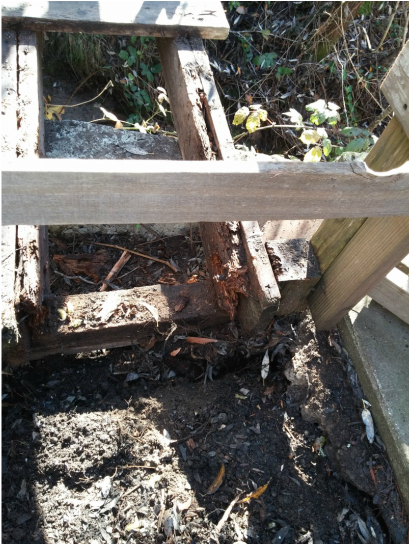 |
 | After cutting up the old bridge I did an assessment of two landing sights for the old bridge. The wall closer to the classroom was very solid and didn't need any shim work. The platform on the archery side was tilted enough that it was necessary to create uniforms shims on the table saw to compensate for the tilt of the platform. Hopefully the weight of the new bridge will not tilt the platform more. It might be necessary at a later date to add more cement to stop this one from sinking. |
| Here you can see the two main support beams in place. After several discussions with Bear who seems to know everything, I changed my mind to some degree. I consulted an engineer through Paul who said that redwood is not strong enough to span the 19ft required. At first I purchased 4x8s in clear Douglas fir. I discussed the questions of rot with Jody and she flatly stated "No Pressure Treated". So my options were only one; Construction grade Douglas Fir. So I chose to go really beefy at 4x12x20ft. That way if rot develops, it will take a long time to eat enough of the beam away to compromise the bridge. Second the beams will be painted with primer and paint to protect them. Finally the beams were capped with redwood ends, wrapped in protectowrap where they connect, and both beams were bolted down with all thread and epoxied into the cement walls | 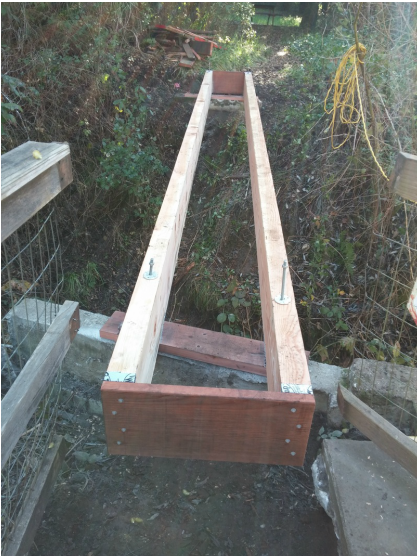 |
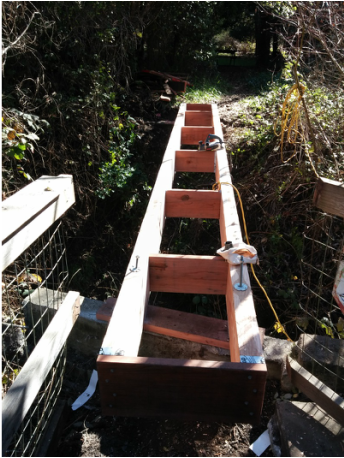 | The next area of potential rot is the tops of the beams. Especially where the redwood decking contacts the Douglas fir. Here I took my electric hand planer and created a convex top to the beams so that the contact area was very small. The second benefit is allowing for water to run off of either side of the tops of the beams. |
| Next I wrapped the top of the convex beams with protecto wrap the entire length of the bridge. This should also reduce the rot that will result from redwood decking sitting on top of Douglas Fir beams. Then I started cutting and screwing down the deck boards. The original bridge was 28 inches wide. Since I had the material I made the bridge 36 inches wide to conform to code. Here you can see the spaces left for the bridge rail supports, which I made next. | 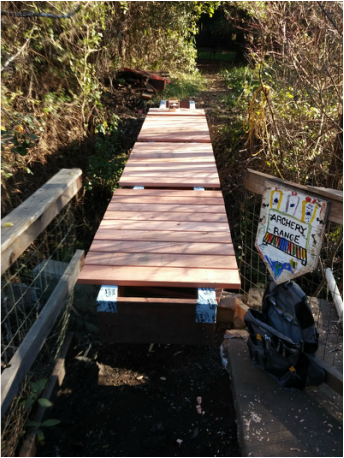 |
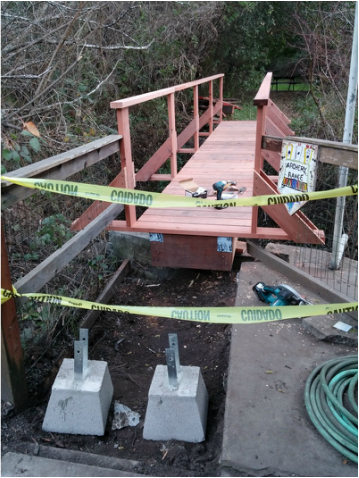 | Here you can see the railing supports with a 2x4 redwood cap on top. The supports are unfortunately only as strong as the deck boards. They extend about 40 inches past the sides of the beams, hence allowing for a lot of flex. If I have some time in May, I will add 4x4 posts that will brace up against the sides of the beams and will make the railing supports much more rigid. Here you can see that I am preparing for the next step of building a ramp down the the original cement. I had to dig down to set the cement piers at a height that was sufficient to support the ramp. |
| Here you can see the beams to support the ramp boards. They were 2x8 redwood beams bolted to the pier blocks and hung off the original bridge section with metal hangers. Then the deck boards were screwed down to the support beams to create a ramp up to the new bridge. | 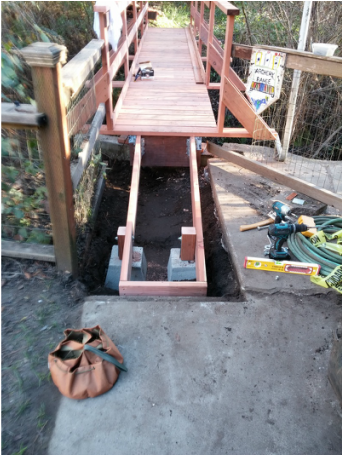 |
 | Here you can see the ramp completed with a big 2x12 beam as the last deck board in the ramp. This board is screwed to the support beams as well as rests on the last step of the cement. |
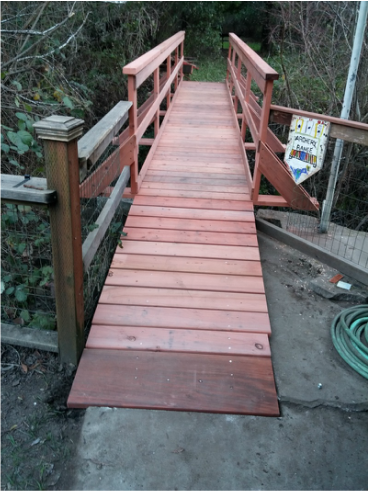
| Since there was a large step down from the new bridge to the trail, instead of packing up the dirt against the end of the bridge I chose to build a small ramp with a 2x10 board and some small bracing. This gives a ramp and step location for kids who find the new step a little large. Here you can also see all the bracing for the railing pretty clearly. I used 2x6 decking material so that the braces would be pretty strong. | 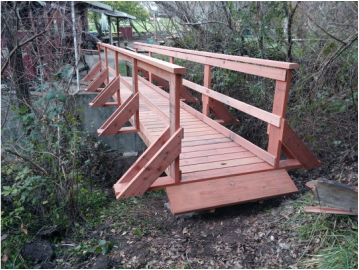 |
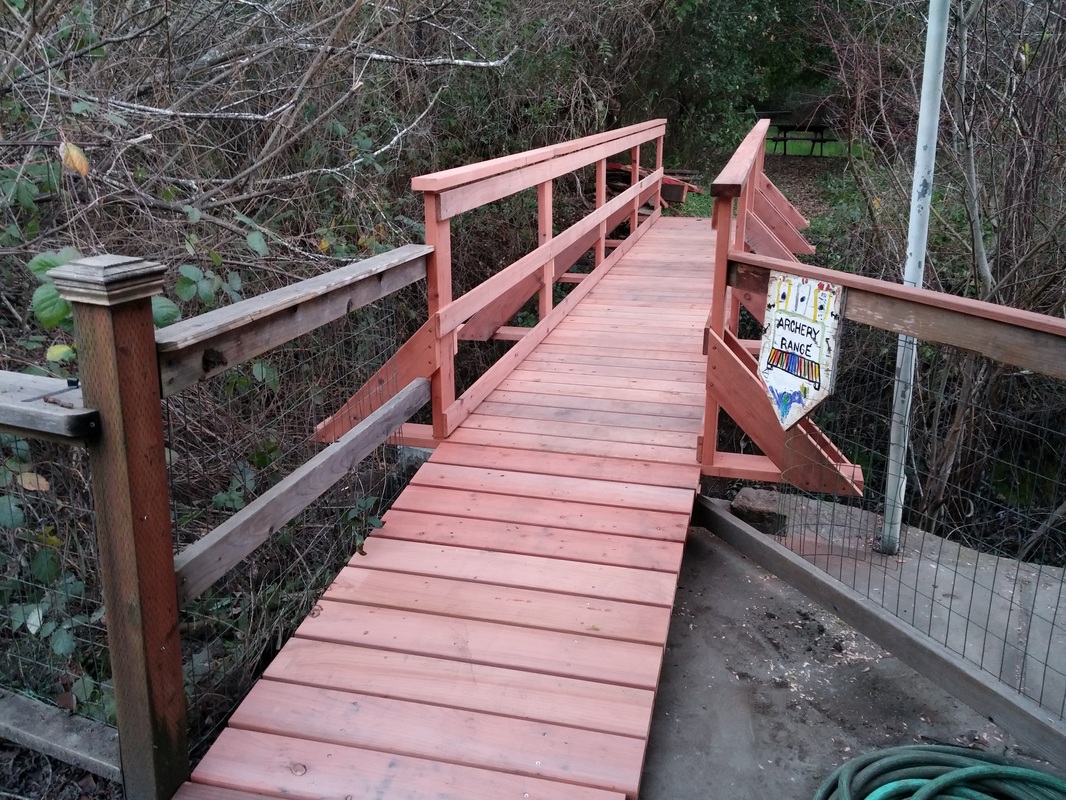 | Final Image of the New Archery Bridge before I went to have my surgery. |
 RSS Feed